

A Show-Stopping Classic
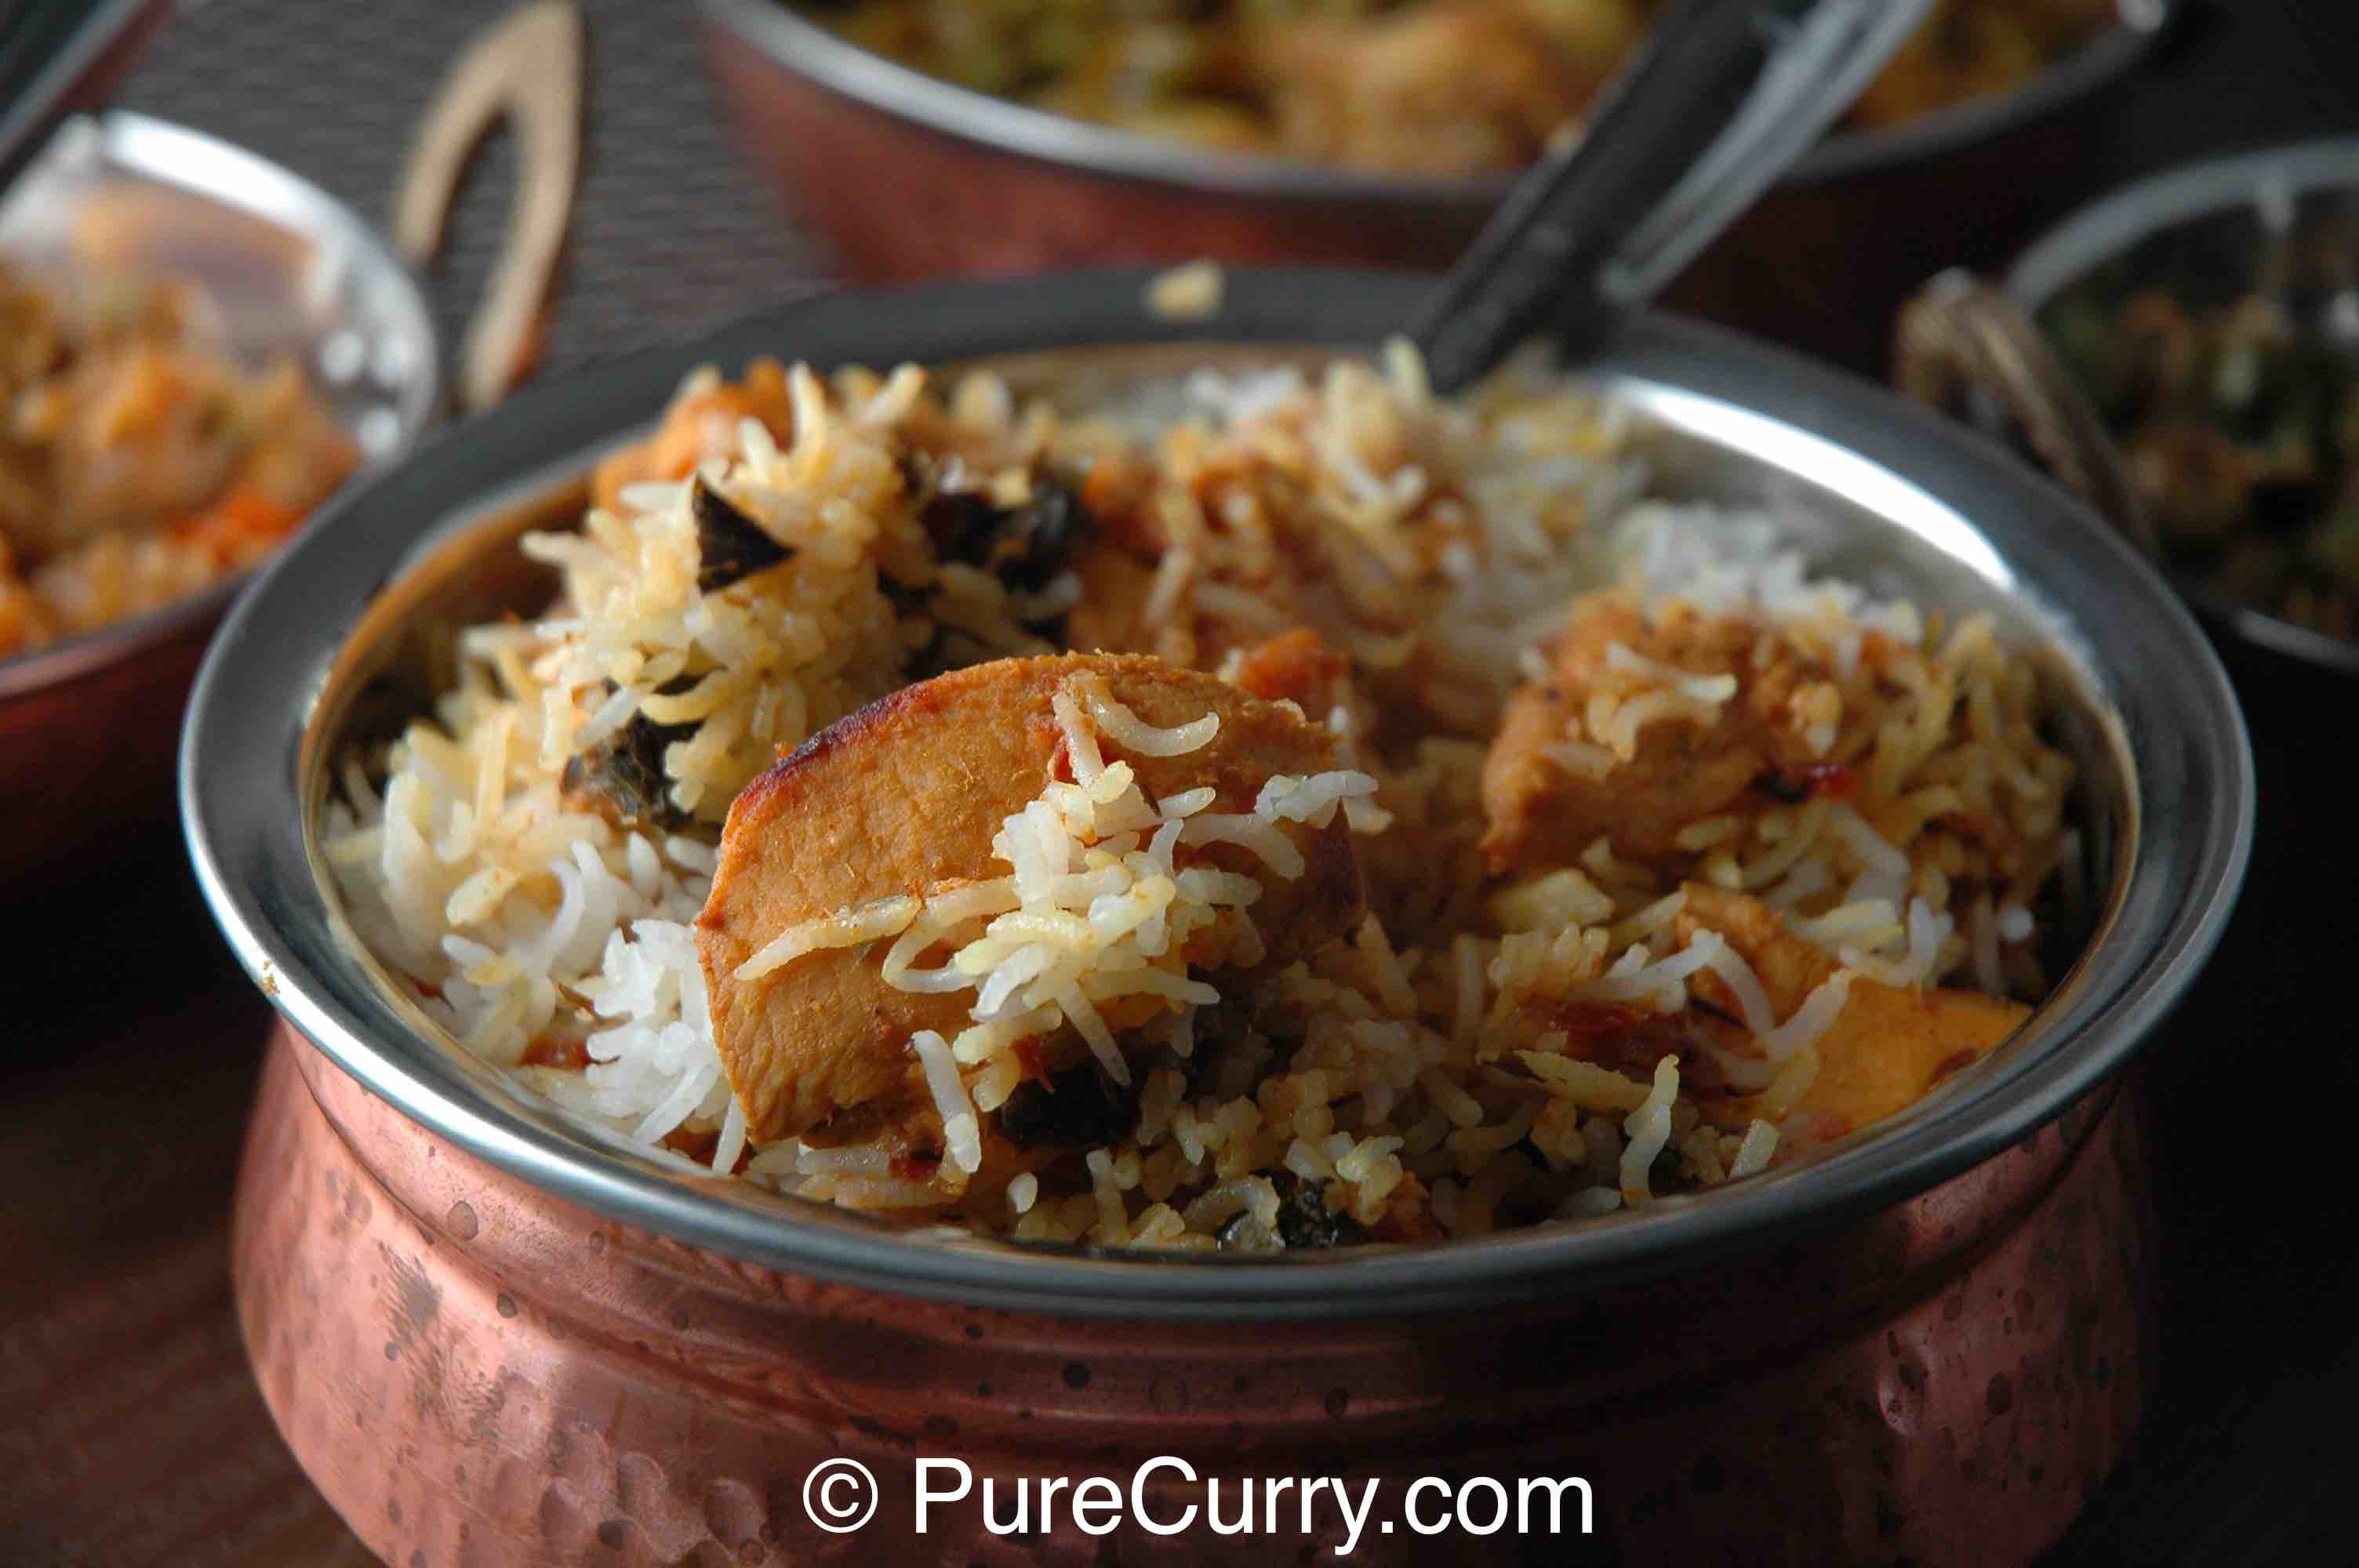
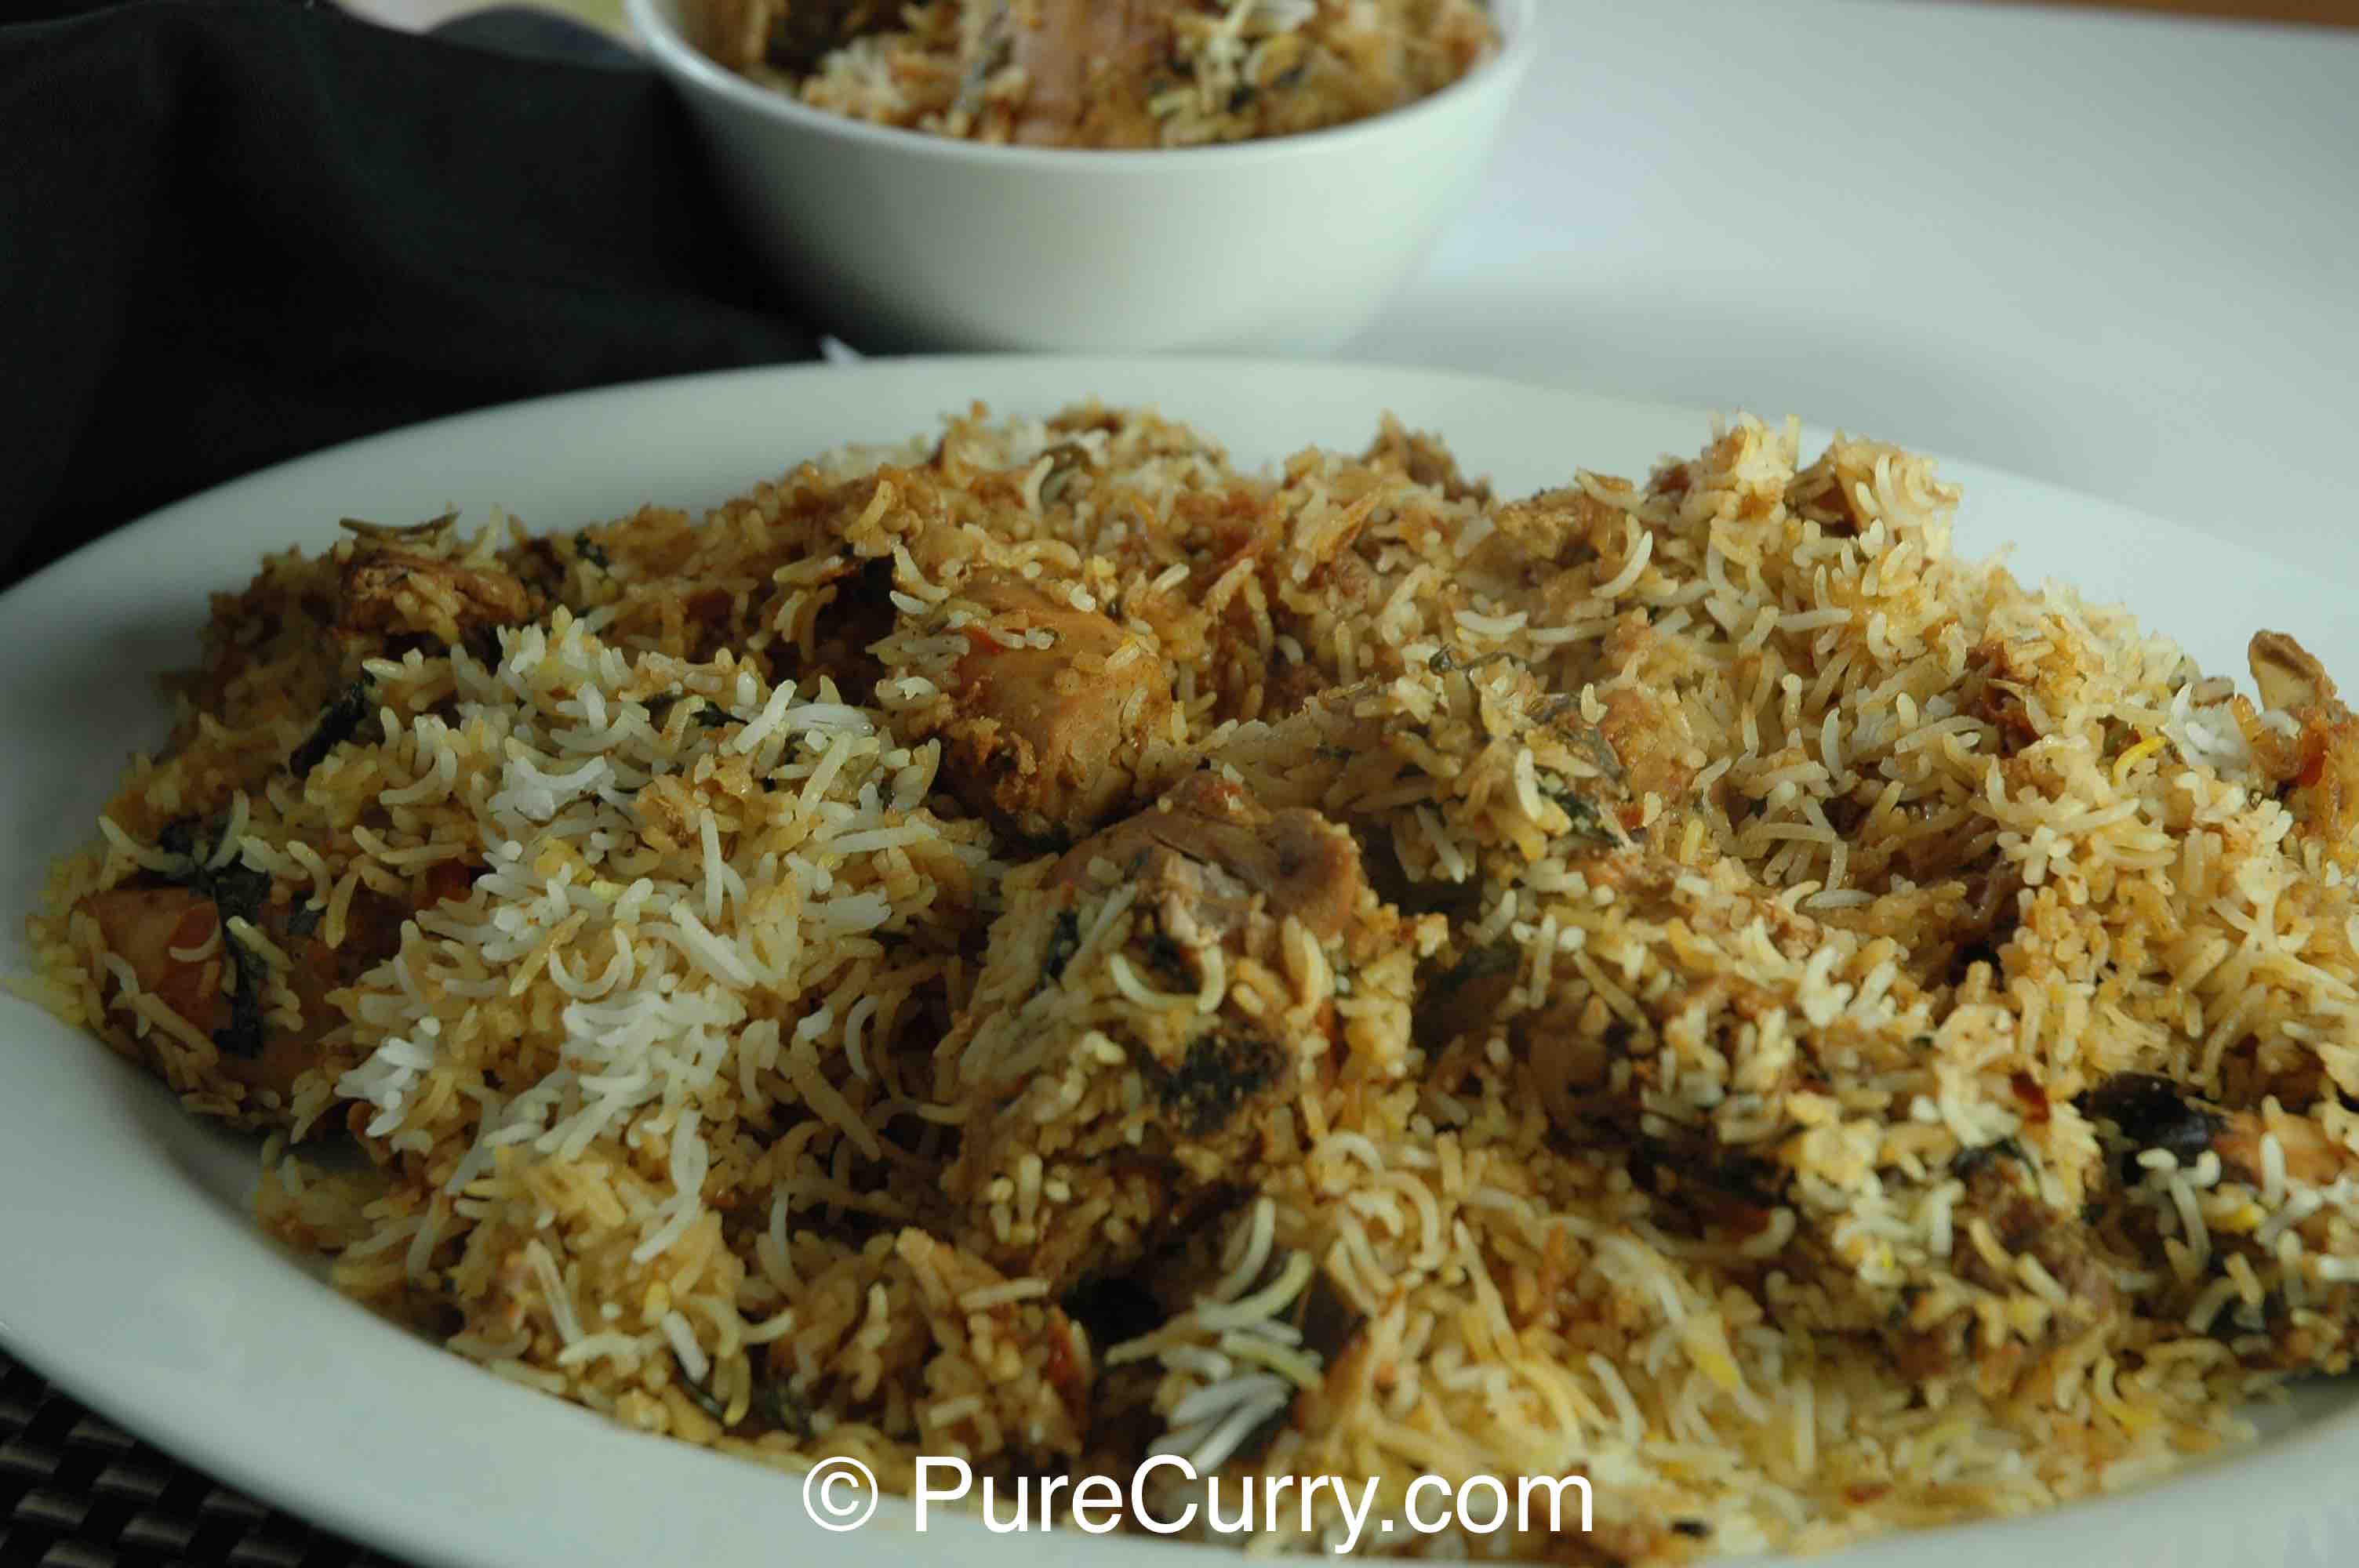
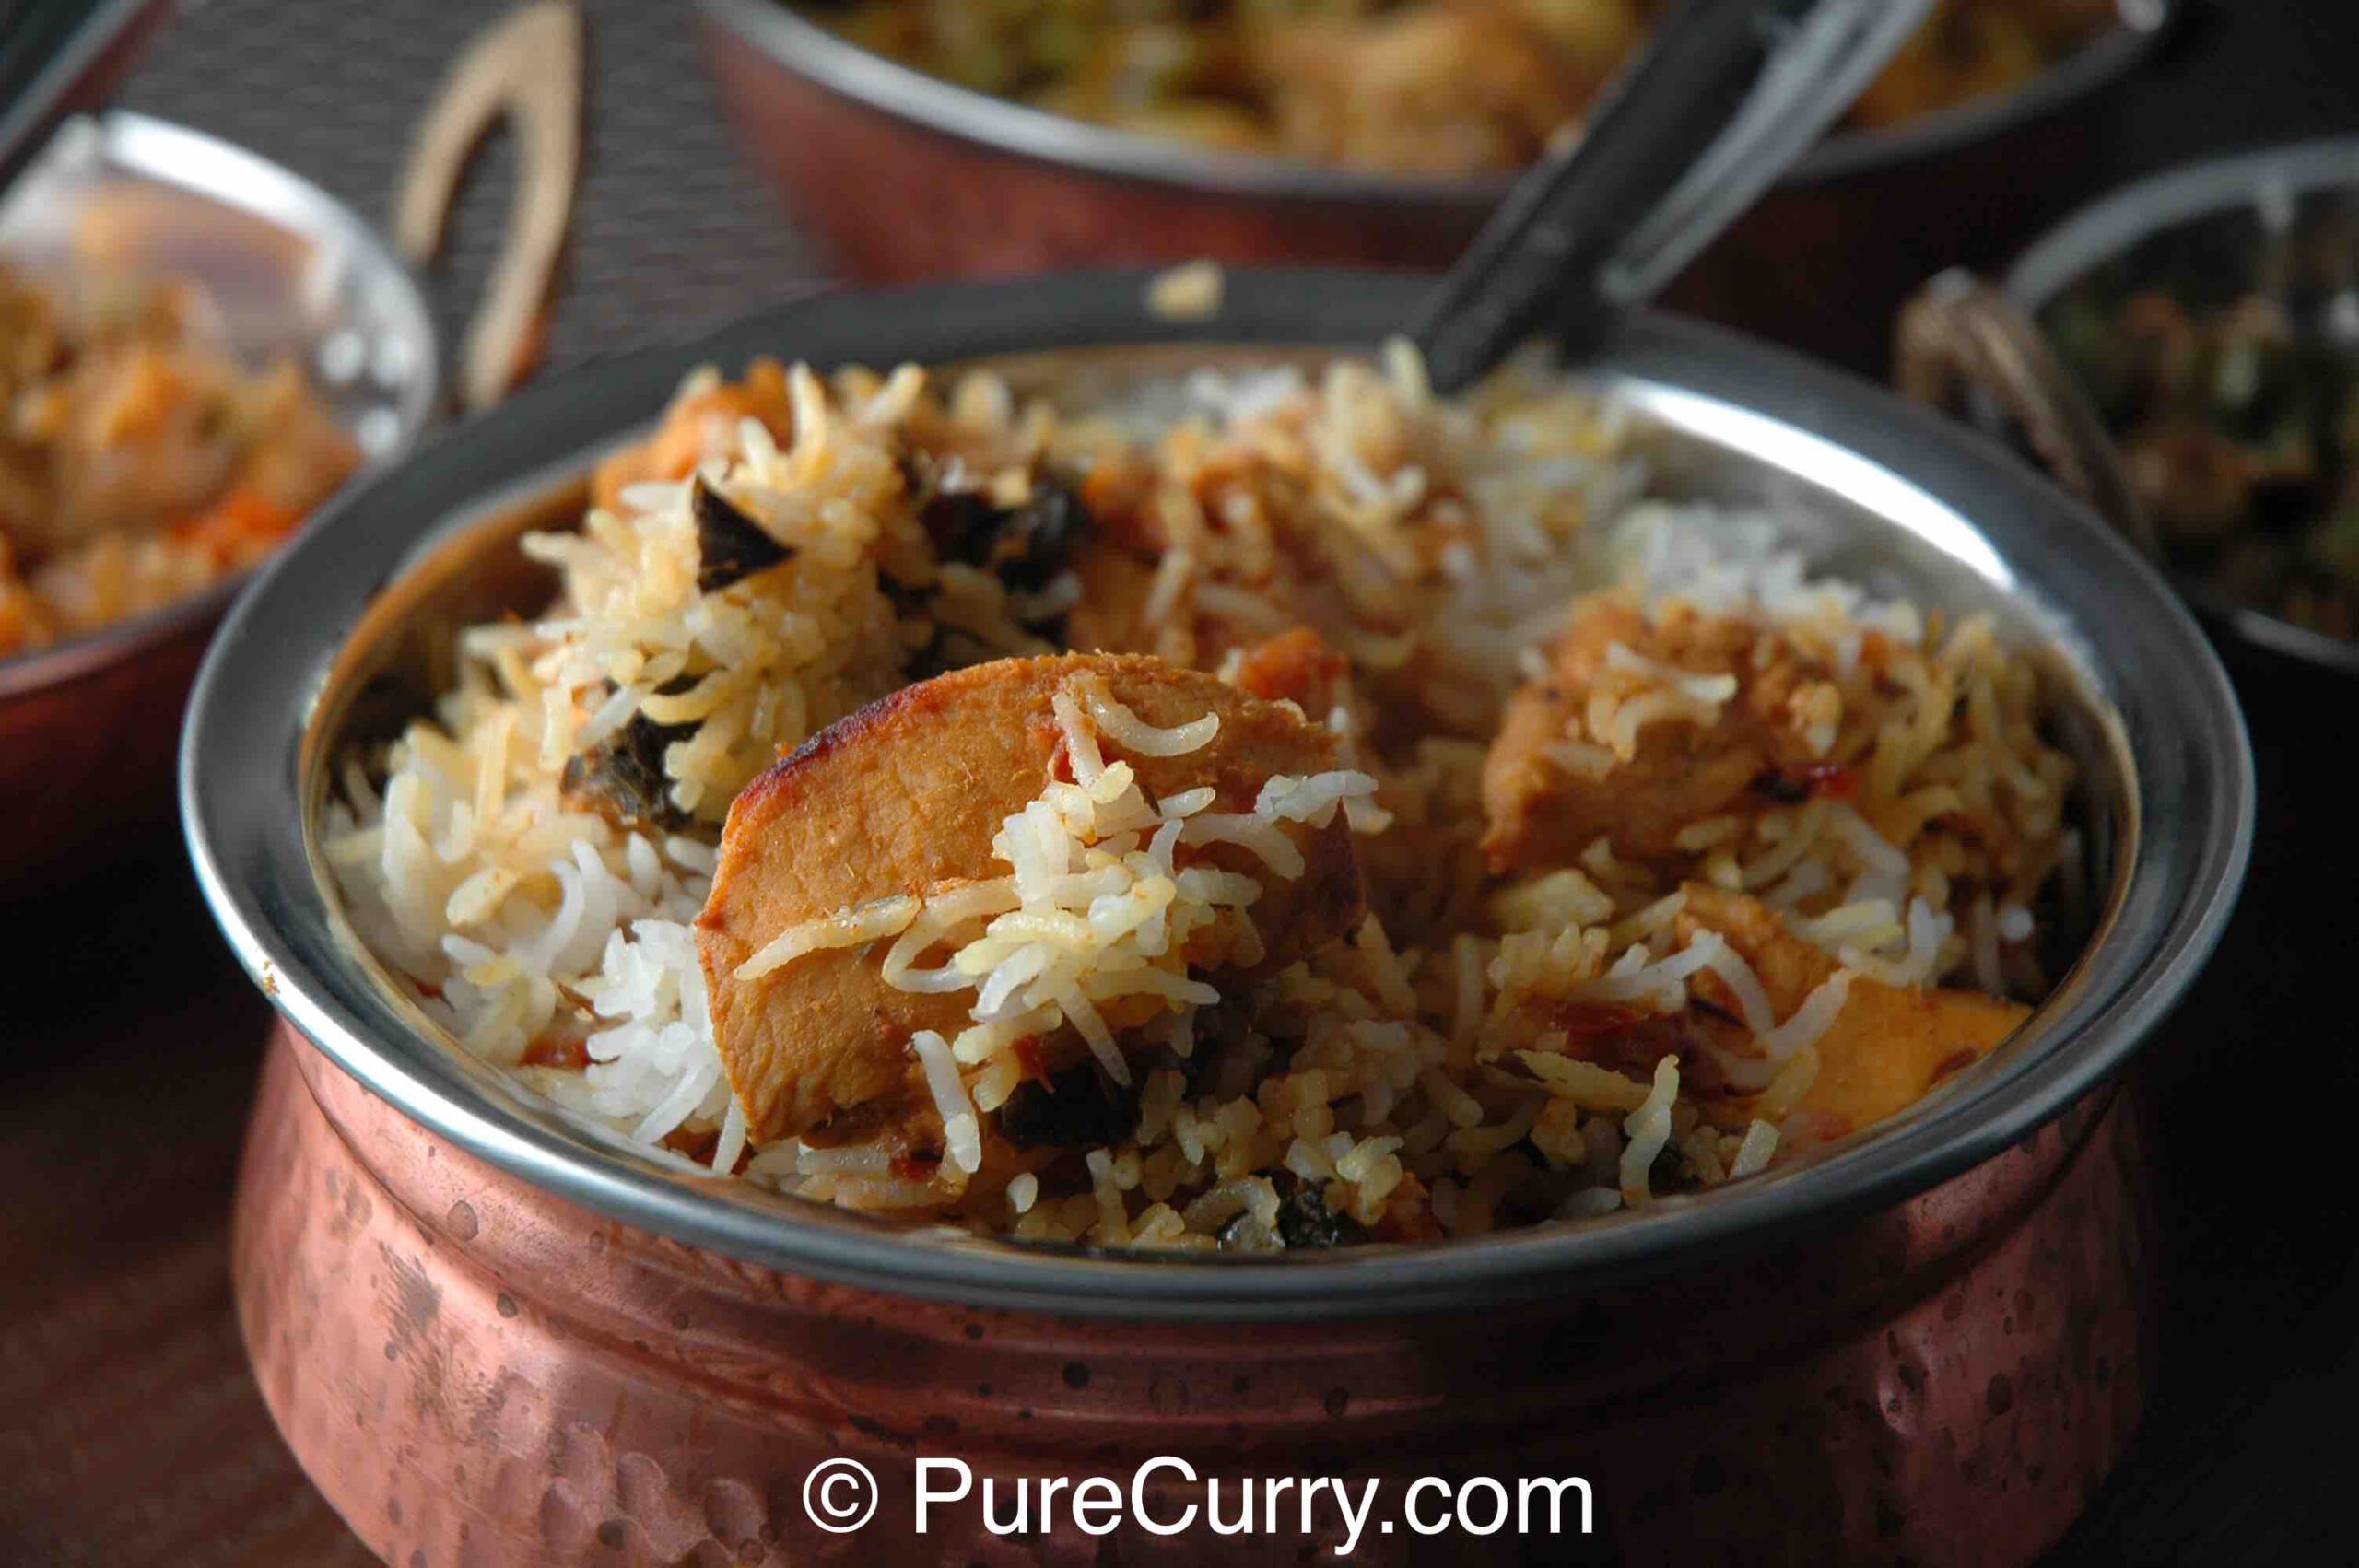
Biryani is one of India’s most beloved dishes and a true showstopper at any dinner table. Fragrant, layered, and deeply flavorful, it’s the kind of meal that instantly feels special. In India, biryani is often served as the main, and sometimes only, dish of a meal, typically accompanied by raita, a cooling yogurt-based condiment that balances the richness and spice.
Raita can be as simple or as elaborate as you like. It may include spices, vegetables, fruits, or even crispy deep-fried gram flour pearls known as boondi. My personal favorite is a refreshing cucumber raita – simple, cooling, and the perfect complement to warm, spiced rice.
For a long time, I believed that making a truly great biryani at home was nearly impossible. It seemed like something that only restaurants or seasoned home cooks could master. What I eventually discovered is that while biryani does require multiple steps, it’s absolutely achievable for the average home cook.
The process involves:
- Sealing the pot and allowing everything to cook together so the flavors meld
- Cooking the chicken in a richly spiced sauce
- Par-boiling the rice
- Layering the chicken and rice
That final stage, known traditionally as dum cooking, is where the magic happens. Steam builds inside the sealed pot, gently finishing the rice while infusing it with the flavor of the chicken and spices.
This recipe walks you through every essential step so you can confidently make a delicious, aromatic biryani at home.
Customizing Your Biryani
While this recipe focuses on the essentials, biryani is wonderfully customizable. You can elevate it with additions such as:
- Cashews
- Raisins
- Hard-boiled eggs
- Fried potatoes
- Extra crispy fried onions
In my opinion, crispy fried onions contribute the most flavor – adding sweetness, texture, and depth. I’ve kept them optional here. You can make them at home or purchase ready-made fried onions from an ethnic grocery store and sprinkle them on during assembly.
Layering Biryani
This recipe creates a single-layer biryani, but you can easily make multiple layers depending on the size of your pot and the quantity you’re preparing.
The key is keeping the layers shallow and even:
- Spread the chicken in a single, even layer at the bottom.
- Top with an even layer of rice.
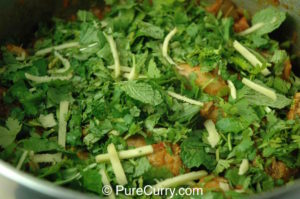
- Sprinkle toppings such as chopped mint, cilantro, saffron-infused milk, and ginger juliennes.
- Repeat if necessary.
Avoid piling ingredients too thickly in one area, as uneven layers can affect how the rice finishes cooking. Even distribution ensures fluffy grains and balanced flavor in every bite.
Biryani is Worth the Effort
At its core, making biryani isn’t difficult. Once you’ve made it a couple of times, you’ll realize it’s essentially preparing chicken curry and rice — but elevating both to the next level through careful layering and steam cooking.
Follow this recipe thoughtfully, and you’ll be rewarded with a biryani that tastes celebratory, comforting, and deeply satisfying. It’s the kind of dish you’ll be proud to serve — and eager to make again.
Avoiding Common Pitfalls
Soak the rice for at least 60 minutes. This helps the grains absorb moisture, reduces cooking time, and prevents them from breaking.
Par-cook the rice. The rice should be slightly undercooked before layering. It will finish cooking during the dum stage, resulting in fluffy, separate grains rather than mushy rice.
Add hot water when layering the biryani. About one cup of the rice boiling liquid helps maintain moisture and ensures the rice steams properly during final cooking.
Monitor the chicken sauce carefully. As the tomato mixture thickens, reduce the heat to prevent scorching at the bottom of the pot.
Tips on Ingredient Selection
Chicken
For the fullest flavor, use bone-in chicken. If you prefer boneless, chicken thighs are better than breasts because they remain juicier and more flavorful.
Aromatic waters
A few drops of rose water or kewra water add a subtle, appetizing fragrance that makes the biryani feel restaurant-worthy.
Saffron
Highly recommended. Soak it in warm milk before adding to enhance both color and aroma.
Herbs
Mint and cilantro are flexible. You can adjust the proportions to suit your taste.
Rice
Use high-quality long-grain rice (preferably aged basmati). The texture of the final dish depends heavily on the quality of the rice.
Utensils Needed
Thick-bottomed pot with a tight-fitting lid
This is essential for assembling and finishing the biryani. A heavy pot prevents burning and helps distribute heat evenly.
Large skillet or griddle (optional but recommended)
Place the biryani pot on top of the skillet during the final cooking stage. This diffuses the heat and prevents scorching, ensuring perfectly cooked rice and tender, flavorful meat. It’s a simple trick that dramatically improves consistency.
Chicken Biryani
Ingredients
- 2.5 tbsp Ghee Or oil
- 6-8 Green Cardamoms
- 4-6 Cloves
- 2 Bay Leaves
- 2.5 tbsp Ginger-garlic Paste
- 1 Onion Large, thinly sliced
- 2.5 pounds Chicken cut up into medium pieces
- 1 tsp Turmeric
- 1/2 tsp Red Chili Powder
- 1 tsp Garam Masala
- 1 tsp Coriander Powder
- 4 Tomatoes around 1.25 pound, diced or crushed
- 2-3 Green Chillies finely chopped
- 1 tsp Salt Adjust to taste
- 2.5 cups Basmati Rice
- 1/2 tsp Caraway Seeds (optional)
- 1 bunch Mint leaves Small
- 1 bunch Cilantro leaves Small
- 1 inch Ginger Julienned
- 6 strands Saffron
- 1 tsp Ghee Or oil
- 2 drops Rose water optional
- 2 drops Kewra Water optional
- 3 tsp Salt Adjust to taste
Method
- Slice the Onions
- Julienne the Ginger
- Dice or crush the Tomatoes

- Add the Saffron to 2 tbsp of warm Milk, or warm water.

- Rinse the rice in a strainer until the water runs clear and then soak it.
- Heat the Ghee in the pot on medium heat, and add the Green Cardamoms, Cloves, Bay Leaves, Cinnamon Stick and Ginger-garlic paste.
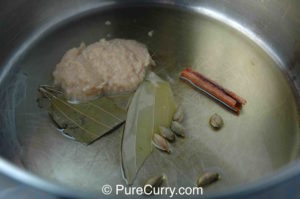
- Fry for a minute until the Ginger-garlic paste turns light brown.
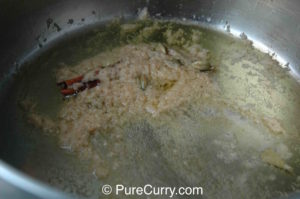
- Add the sliced Onions and continue frying them. Sprinkle a little salt on the Onions, this will speed up the browning.

- Fry the onions until they turn light to slightly dark brown; around 12-15 minutes.

- Add the Chicken pieces, Coriander Powder, Garam Masala, Turmeric Powder, Red Chili Powder, and about 1 tsp Salt.
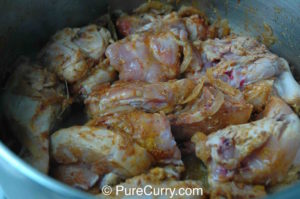
- Mix well and cook on medium heat, tossing every few minutes, to lightly brown the chicken pieces; about 10 minutes.
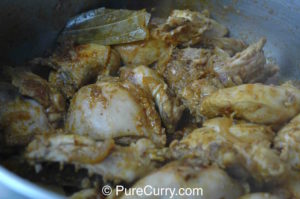
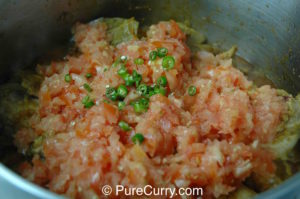
- Add the diced tomatoes, green chilies and mix well.
- Continue cooking while stirring every few minutes.
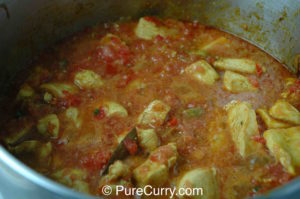
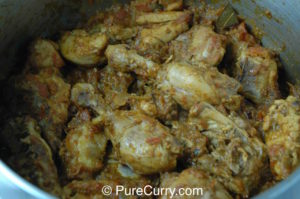
- Cook the tomatoes until all the liquid dries up. The sauce should be thick and the oil will separate out. This can take anywhere from 15-30 minutes. TIP: Fish out the whole spices from the pot, and discard.

- Boil 6 cups of water in a pot with about 2 tsp Salt, Caraway Seeds and a Bay Leaf. IMPORTANT: You can’t season rice after it’s cooked—so be sure to add salt to the water. And add enough salt to the water while boiling it – the water should taste salty.

- Bring the water to a rolling boil.
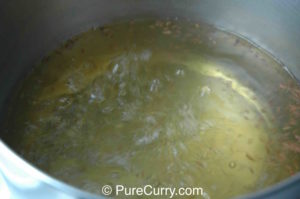
- Add the drained rice and discard the water in which the rice was soaked.

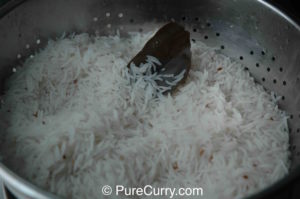
- When the pot comes back to a boil, check a few grains of rice. When pressed between your fingers (careful, they’re going to be hot!), the rice grain should break easily but should not get crushed. TIP: Slightly undercooking the rice is one of the keys to making a great biryani.

- At this point, immediately turn off the heat and drain the rice in a colander. Reserve one cup of the boiling water. TIP: If you boil the rice before you are ready to assemble the biryani, then pour cold water over the drained rice to stop it from cooking further. I usually finish cooking the Chicken, then boil the rice and assemble the biryani right away.
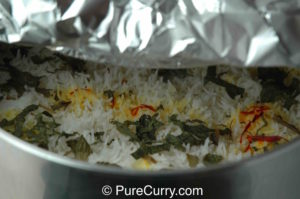
- It’s time to assemble the biryani in the pot for the final steam cooking. Spread the chicken around the base of the pot.
- Spread the chopped Mint and Cilantro leaves and Ginger juliennes. You’ll note in the photo that I use a generous quantity of Mint and Cilantro, but adjust to your taste.
- Spread the rice on top and cover the chicken completely. To the reserved cup of boiling water from the rice, add a teaspoon of Ghee, a few drops of Rose Water and Kewra water; stir and then pour it evenly over the rice.
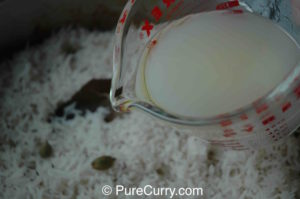
- Spread the Saffron milk on top of the rice.

- Sprinkle some more chopped Mint and Cilantro leaves on top of the rice.
- Seal the pot with aluminum foil and cover with a lid. Place the pot on top of the skillet.

- With the heat on medium, cook for 25 minutes, then turn it off. The goal is to build enough steam inside the pot so it rises through the rice. If you were to open the lid at this point (which you shouldn’t), you would see steam actively escaping.

- Allow the pot to sit undisturbed for at least 20 minutes. This resting time helps the flavors deepen and meld beautifully with the rice. When you open the lid, breathe in the aroma—your Chicken Biryani is ready!TIP: To check if the biryani is done, slide a butter knife vertically into the rice and pull it out. A clean knife means all the liquid has evaporated. If it comes out wet, seal the pot again and cook on low for another 10–15 minutes.
Nutrition
Notes
Avoiding Common Pitfalls
Soak the rice for at least 60 minutes. This helps the grains absorb moisture, reduces cooking time, and prevents them from breaking. Par-cook the rice. The rice should be slightly undercooked before layering. It will finish cooking during the dum stage, resulting in fluffy, separate grains rather than mushy rice. Add hot water when layering the biryani. About one cup of the rice boiling liquid helps maintain moisture and ensures the rice steams properly during final cooking. Monitor the chicken sauce carefully. As the tomato mixture thickens, reduce the heat to prevent scorching at the bottom of the pot.Tips on Ingredient Selection
ChickenFor the fullest flavor, use bone-in chicken. If you prefer boneless, chicken thighs are better than breasts because they remain juicier and more flavorful. Aromatic waters
A few drops of rose water or kewra water add a subtle, appetizing fragrance that makes the biryani feel restaurant-worthy. Saffron
Highly recommended. Soak it in warm milk before adding to enhance both color and aroma. Herbs
Mint and cilantro are flexible. You can adjust the proportions to suit your taste. Rice
Use high-quality long-grain rice (preferably aged basmati). The texture of the final dish depends heavily on the quality of the rice.
Utensils Needed
Thick-bottomed pot with a tight-fitting lidThis is essential for assembling and finishing the biryani. A heavy pot prevents burning and helps distribute heat evenly. Large skillet or griddle (optional but recommended)
Place the biryani pot on top of the skillet during the final cooking stage. This diffuses the heat and prevents scorching, ensuring perfectly cooked rice and tender, flavorful meat. It’s a simple trick that dramatically improves consistency.

Leave a Reply